完整安装(Full Installation)
完整安装需要在硬盘里专门划出一个ext2/3/4分区,完整安装后,直接卸载半步中文体验包(或一步到位中文包)可能会导致系统无法启动或无法进入X图形界面,也无法外挂sfs镜像文件。如果没有特别需求,不推荐用这种方式来安装Puppy Linux。
Full Installation
A Full Installation installs Puppy onto the hard drive like any other"normal" Linux. This kind of installation is a good idea if you haveless than 256 MB of memory.
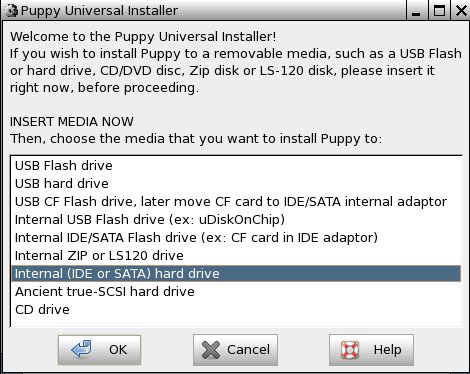
Start "Menu | Setup | Puppy universal installer". Select the mediumthat you want to install Puppy to. I chose the internal hard drive forthis example.
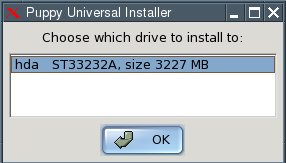
If you have more than one hard drive, choose one.
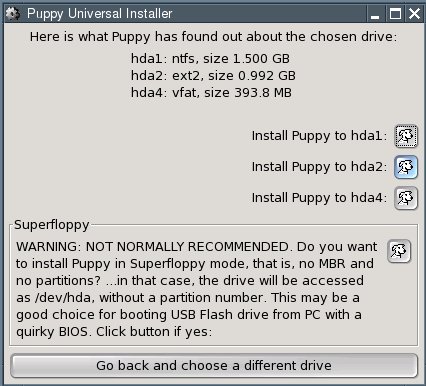
Click the button next to the partition that you want to install Puppy to.
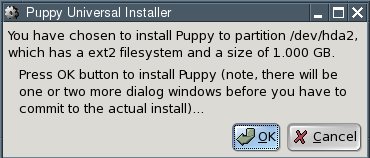
Confirm the next dialogue by clicking "OK".
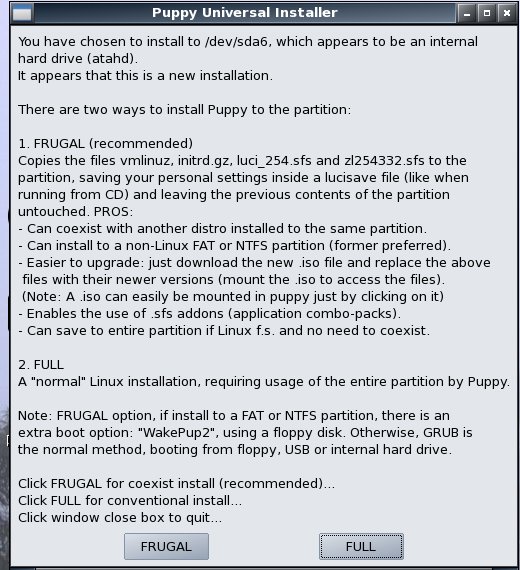
You now have to decide whether you want a "Frugal" or a "Full"installation. Since this chapter describes a Full installation, clickthe button labelled "FULL".
The files will be copied from the CD to the hard drive.


Since you now have two operating systems on your computer (Windowsand Puppy Linux), you need a boot loader. The boot loader is the firstprogram executed after switching the computer on. It enables you tospecify which operating system should be started up. If Windows was theonly operating system on your computer up to now, you do not have aboot loader. The Puppy Installer can install GRUB as a boot loader foryou. To do this, click on "INSTALL GRUB".

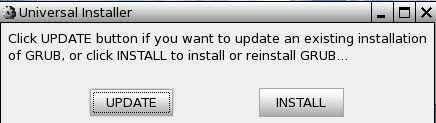
In the next dialogue box click "Install"
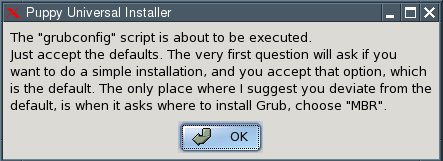
Confirm the next dialogue by clicking "OK".
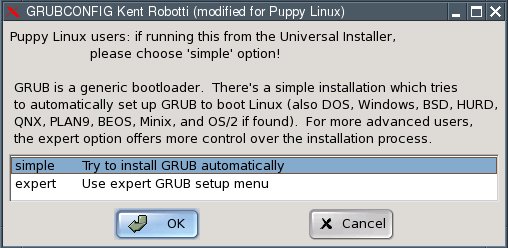
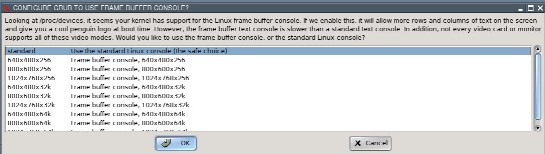
Select "simple installation" and click "OK".
In the next dialogue box, select "standard" and click "OK".
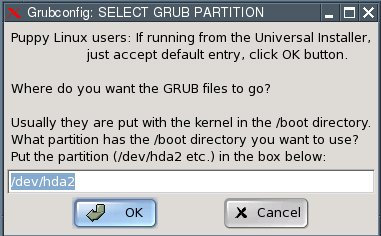
Now you have to specify where the GRUB boot loader should store itsfiles. These can only be written to a Linux file system partition.Thus, please type "/dev/hda2" - that is, the same partition to whichPuppy has just been installed.
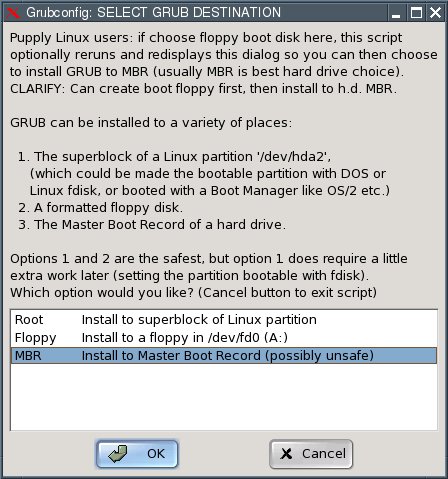
Now you have to specify where the GRUB boot loader itself should beinstalled to. Select the Master Boot Record "MBR" and click "OK".
Confirm the next dialogue by clicking "OK".

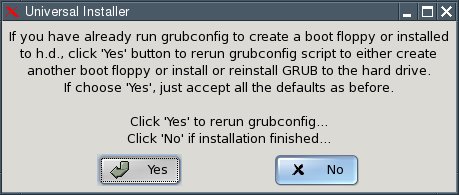
In the next dialogue box, click the "No" button.
The installation is complete. What remains to be done is toconfigure the GRUB boot loader so that Puppy Linux can be booted. Thisis how to do it:
Open the file "menu.lst". You will find this file in the /boot/grubdirectory of the partition you installed the GRUB files to (/dev/hda2in our example). For Linux newbies, I include detailed instructions onhow to find and open this file. More advanced users can skip ahead towhere menu.lst gets edited.
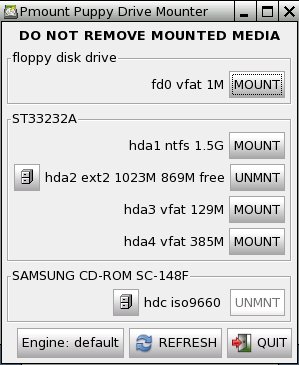
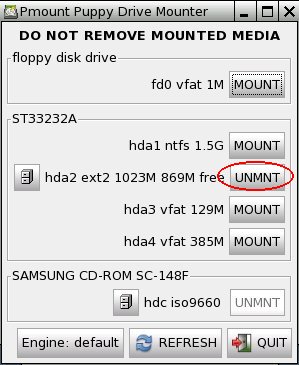
Start "Menu | Filesystem | Pmount mount/unmount drives" and click on the button "MOUNT" next to "/dev/hda2".

The button changes to "UNMNT".
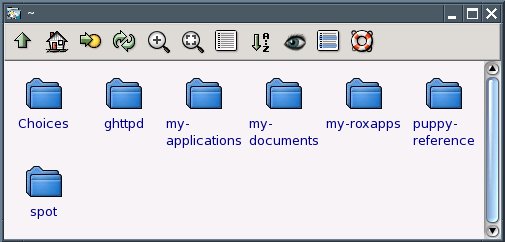
Start "Menu | Filesystem | ROX-Filer file filemanager".
Click with the right mouse button and choose "Window | Enter Path" from the context menu.
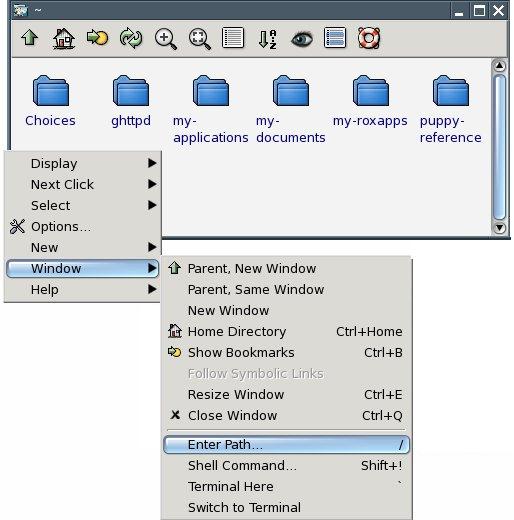
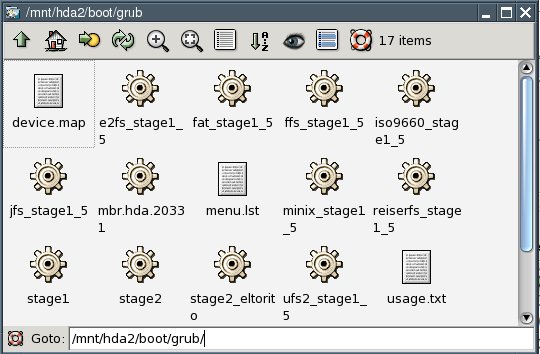
Type this into the box labelled "Goto" (do not omit the slash at the end): /mnt/hda2/boot/grub/
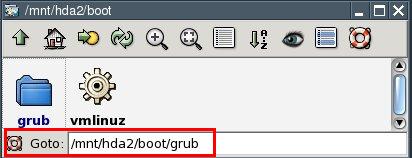
You are now inside the /mnt/hda2/boot/grub/ folder.
Use the right mouse button to click on the file called "menu.lst".
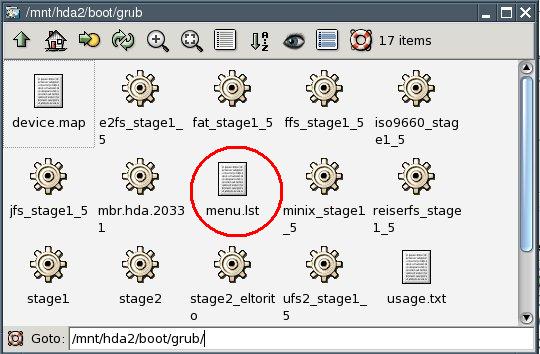
From the context menu that pops up, select "File menu.lst | Open As Text".

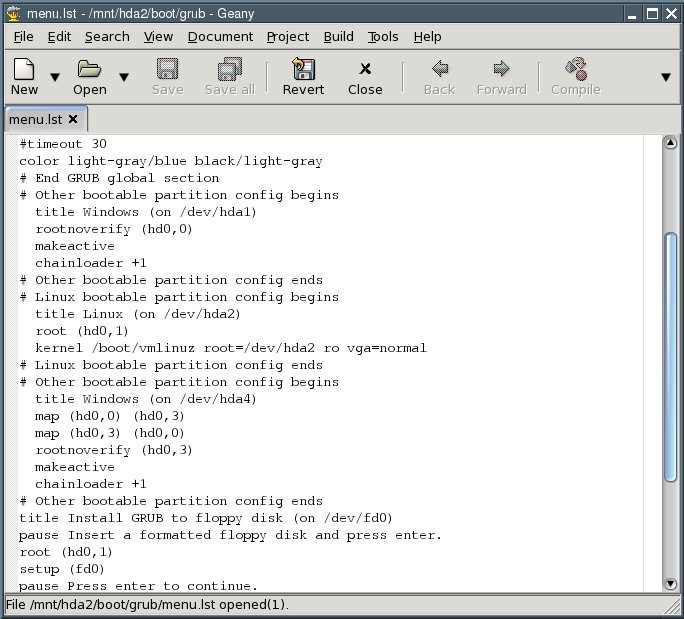
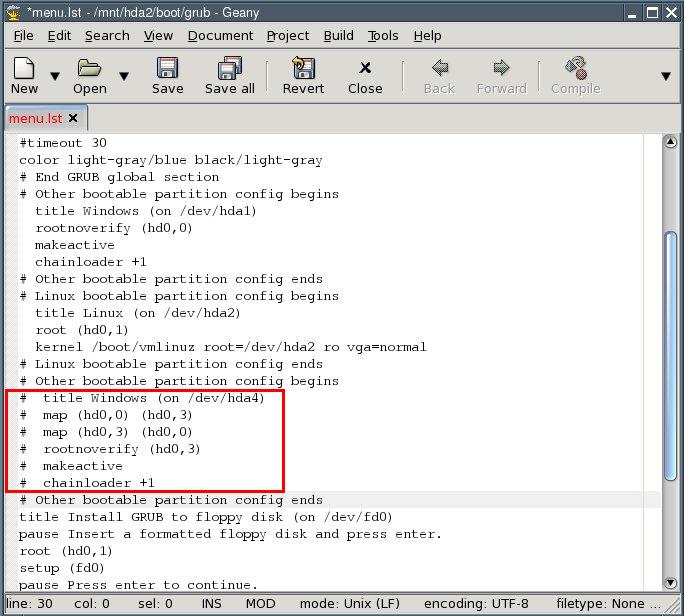
You can now see the contents of the menu.lst file.
"Comment out", i.e. put a number sign (#) before each of the following lines:
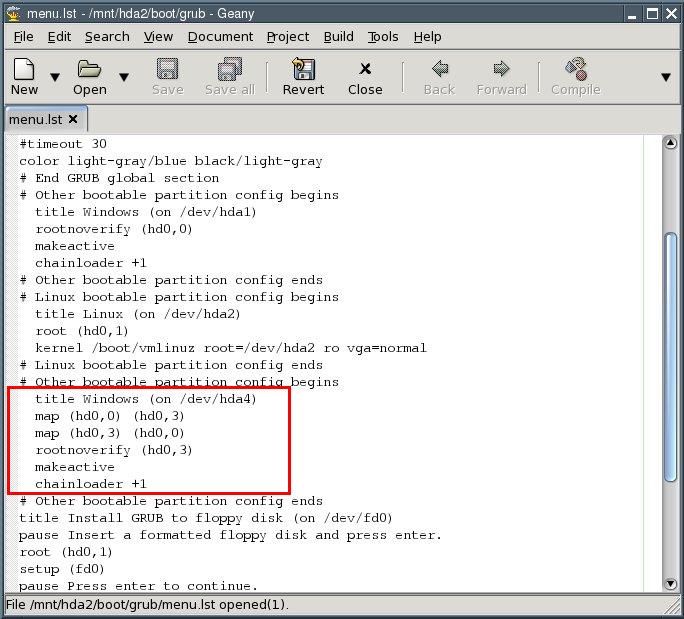
All necessary changes have been made. The file should now look like this:
Save the file by selecting "File | Save" from the program's menu. Exit the text editor.
Close the ROX file manager.
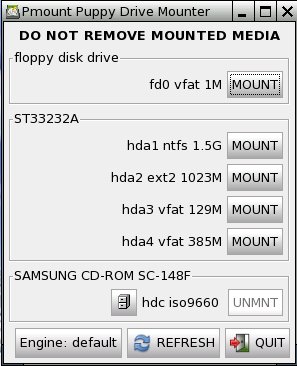
Click on the button "UNMNT" next to /dev/hda2.
The button changes to "MOUNT".
Exit Puppy and reboot the computer: "Menu | Shutdown | Reboot computer".
When you reboot the computer, you will be asked whether you want tosave the "session" (i.e., all the configuration changes you made).Select "DO NOT SAVE" with the cursor keys and hit Return.
Your computer will now shut down completely and then start up again.You will then see the boot loader come up. Select "Puppy Linux (on/dev/hda2)" with the cursor keys and press Return. Puppy boots up. Atthe first bootup, you will once again have to specify your country andyour screen resolution. This configuration is saved so that you do nothave to repeat this process at the next bootup.